Two-Factor Authentication
Two-factor Authentication (2FA) provides an additional level of security to your GitLab account. Once enabled, in addition to supplying your username and password to login, you'll be prompted for a code generated by an application on your phone.
By enabling 2FA, the only way someone other than you can log into your account is to know your username and password and have access to your phone.
Overview
Note: When you enable 2FA, don't forget to back up your recovery codes.
In addition to a phone application, GitLab supports U2F (universal 2nd factor) devices as the second factor of authentication. Once enabled, in addition to supplying your username and password to login, you'll be prompted to activate your U2F device (usually by pressing a button on it), and it will perform secure authentication on your behalf.
The U2F workflow is only supported by Google Chrome at this point, so we strongly recommend that you set up both methods of two-factor authentication, so you can still access your account from other browsers.
Enabling 2FA
There are two ways to enable two-factor authentication: via a mobile application or a U2F device.
Enable 2FA via mobile application
In GitLab:
- Log in to your GitLab account.
- Go to your Profile Settings.
- Go to Account.
- Click Enable Two-factor Authentication.
On your phone:
- Install a compatible application. We recommend Google Authenticator (proprietary) or FreeOTP (open source).
- In the application, add a new entry in one of two ways:
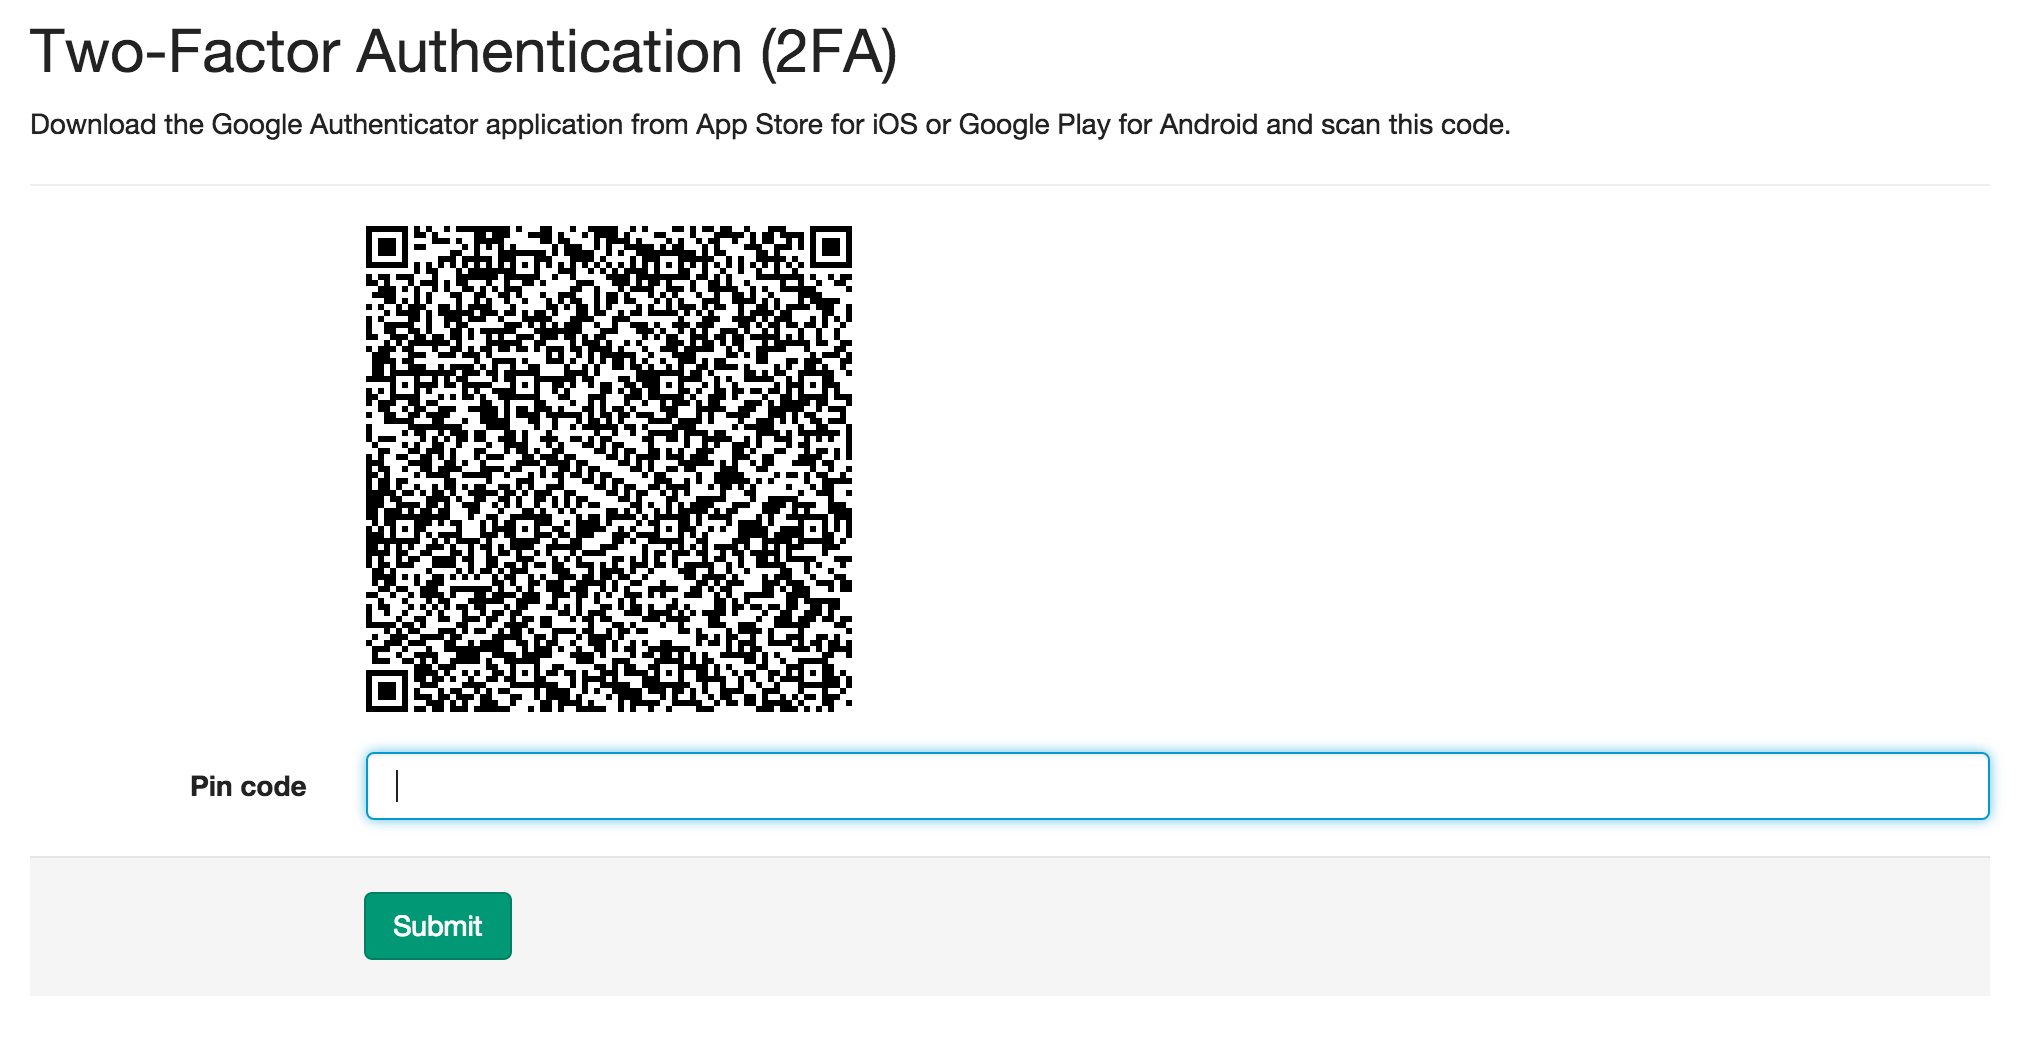
- Scan the code with your phone's camera to add the entry automatically.
- Enter the details provided to add the entry manually.
In GitLab:
- Enter the six-digit pin number from the entry on your phone into the Pin code field.
- Click Submit.
If the pin you entered was correct, you'll see a message indicating that Two-Factor Authentication has been enabled, and you'll be presented with a list of recovery codes.
Enable 2FA via U2F device
Notes:
- GitLab officially only supports Yubikey U2F devices.
- Support for U2F devices was added in GitLab 8.8.
In GitLab:
- Log in to your GitLab account.
- Go to your Profile Settings.
- Go to Account.
- Click Enable Two-Factor Authentication.
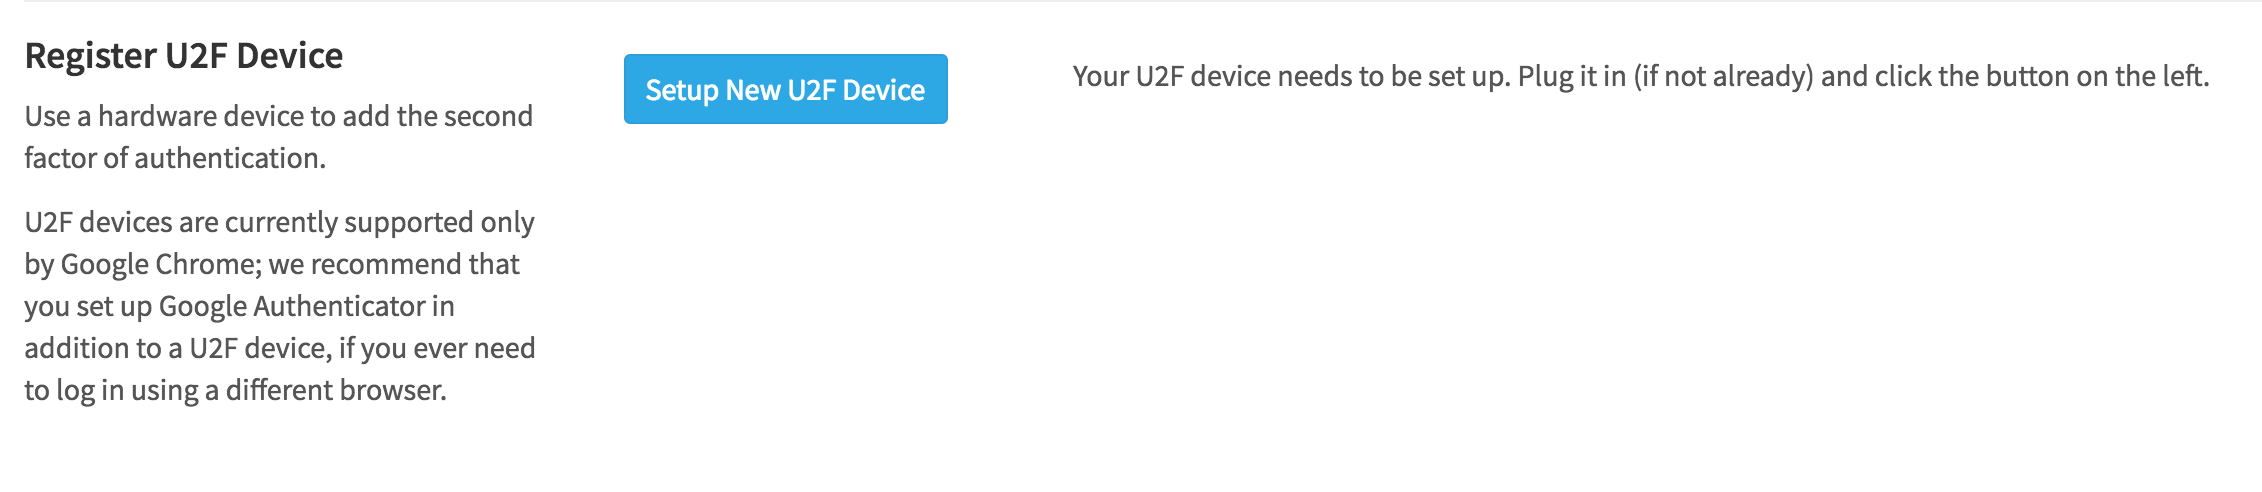
- Plug in your U2F device.
- Click on Setup New U2F Device.
- A light will start blinking on your device. Activate it by pressing its button.
You will see a message indicating that your device was successfully set up. Click on Register U2F Device to complete the process.
Recovery Codes
Note: Recovery codes are not generated for U2F devices.
Should you ever lose access to your phone, you can use one of the ten provided backup codes to login to your account. We suggest copying or printing them for storage in a safe place. Each code can be used only once to log in to your account.
If you lose the recovery codes or just want to generate new ones, you can do so from the Profile settings ➔ Account page where you first enabled 2FA.
Logging in with 2FA Enabled
Logging in with 2FA enabled is only slightly different than a normal login. Enter your username and password credentials as you normally would, and you'll be presented with a second prompt, depending on which type of 2FA you've enabled.
Log in via mobile application
Enter the pin from your phone's application or a recovery code to log in.

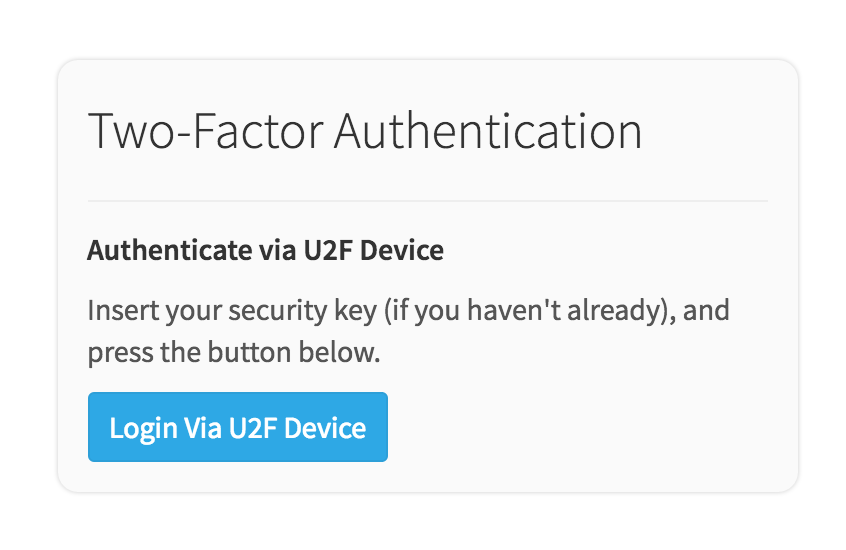
Log in via U2F device
- Click Login via U2F Device
- A light will start blinking on your device. Activate it by pressing its button.
You will see a message indicating that your device responded to the authentication request. Click on Authenticate via U2F Device to complete the process.
Disabling 2FA
- Log in to your GitLab account.
- Go to your Profile Settings.
- Go to Account.
- Click Disable, under Two-Factor Authentication.
This will clear all your two-factor authentication registrations, including mobile applications and U2F devices.
Personal access tokens
When 2FA is enabled, you can no longer use your normal account password to authenticate with Git over HTTPS on the command line or when using GitLab's API, you must use a personal access token instead.
Recovery options
To disable two-factor authentication on your account (for example, if you have lost your code generation device) you can:
- Use a saved recovery code
- Generate new recovery codes using SSH
- Ask a GitLab administrator to disable two-factor authentication on your account
Use a saved recovery code
Enabling two-factor authentication for your account generated several recovery codes. If you saved these codes, you can use one of them to sign in.
To use a recovery code, enter your username/email and password on the GitLab sign-in page. When prompted for a two-factor code, enter the recovery code.
Note: Once you use a recovery code, you cannot re-use it. You can still use the other recovery codes you saved.
Generate new recovery codes using SSH
Users often forget to save their recovery codes when enabling two-factor authentication. If an SSH key is added to your GitLab account, you can generate a new set of recovery codes with SSH.
- Run
ssh git@gitlab.example.com 2fa_recovery_codes. -
You are prompted to confirm that you want to generate new codes. Continuing this process invalidates previously saved codes.
bash
$ ssh git@gitlab.example.com 2fa_recovery_codes
Are you sure you want to generate new two-factor recovery codes?
Any existing recovery codes you saved will be invalidated. (yes/no)

yes

Your two-factor authentication recovery codes are:

119135e5a3ebce8e
11f6v2a498810dcd
3924c7ab2089c902
e79a3398bfe4f224
34bd7b74adbc8861
f061691d5107df1a
169bf32a18e63e7f
b510e7422e81c947
20dbed24c5e74663
df9d3b9403b9c9f0

During sign in, use one of the codes above when prompted for your
two-factor code. Then, visit your Profile Settings and add a new device
so you do not lose access to your account again.
Go to the GitLab sign-in page and enter your username/email and password. When prompted for a two-factor code, enter one of the recovery codes obtained from the command-line output.
Note: After signing in, visit your Profile settings > Account immediately to set up two-factor authentication with a new device.
Ask a GitLab administrator to disable two-factor authentication on your account
If you cannot use a saved recovery code or generate new recovery codes, ask a GitLab global administrator to disable two-factor authentication for your account. This will temporarily leave your account in a less secure state. Sign in and re-enable two-factor authentication as soon as possible.
Note to GitLab administrators
- You need to take special care to that 2FA keeps working after restoring a GitLab backup.
- To ensure 2FA authorizes correctly with TOTP server, you may want to ensure your GitLab server's time is synchronized via a service like NTP. Otherwise, you may have cases where authorization always fails because of time differences.
-
The GitLab U2F implementation does not work when the GitLab instance is accessed from multiple hostnames, or FQDNs. Each U2F registration is linked to the current hostname at the time of registration, and cannot be used for other hostnames/FQDNs.
For example, if a user is trying to access a GitLab instance from
first.host.xyzandsecond.host.xyz:- The user logs in via
first.host.xyzand registers their U2F key. - The user logs out and attempts to log in via
first.host.xyz- U2F authentication suceeds. - The user logs out and attempts to log in via
second.host.xyz- U2F authentication fails, because the U2F key has only been registered onfirst.host.xyz.
- The user logs in via